Building your own PC is an exciting and rewarding experience. Whether you’re a gamer, content creator, or tech enthusiast, customizing your dream PC ensures you get exactly what you need. One of the best tools to simplify the process is PC PartPicker, a user-friendly platform that helps you select compatible components, compare prices, and build your ultimate rig. This guide will take you through every step of building your dream PC with PC PartPicker.
1. Understanding PC PartPicker
PC PartPicker is an online platform designed to make PC building easier and more efficient. It allows users to:
- Choose components that are guaranteed to be compatible.
- Compare prices across multiple retailers.
- View community builds for inspiration.
The platform also provides helpful warnings if there are any potential compatibility issues, ensuring your build is seamless.
2. Setting Your Budget
Before diving into PC PartPicker, decide on a budget. Building a PC can range from a few hundred dollars to several thousand, depending on your requirements. Here are a few tips:
- Allocate more of your budget to components like the CPU and GPU if you’re into gaming or video editing.
- Don’t forget to include costs for peripherals such as monitors, keyboards, and mice.
- Leave some room for future upgrades.
3. Choosing the Right Components
PC PartPicker categorizes components into sections like CPUs, GPUs, RAM, storage, motherboards, and more. Here’s a breakdown of how to choose the right parts:
3.1 Central Processing Unit (CPU)
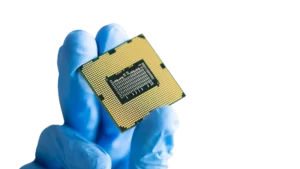
The CPU is the brain of your computer. Popular brands like Intel and AMD offer a range of processors for different needs. For gaming, a high clock speed is crucial, while for multitasking or content creation, more cores and threads are essential.

3.2 Graphics Processing Unit (GPU)
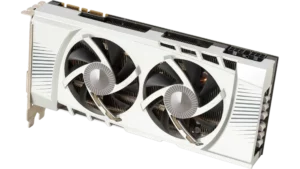
If you’re a gamer or work with rendering software, the GPU is the heart of your system. Brands like NVIDIA and AMD Radeon dominate this space. Use PC PartPicker to compare benchmarks and ensure compatibility with your other components.

3.3 Memory (RAM)
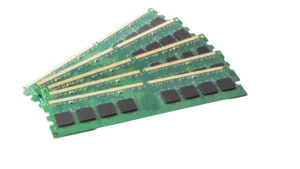
For most users, 16GB of RAM is sufficient, but content creators and heavy multitaskers might need 32GB or more. Pay attention to the RAM’s speed and compatibility with your motherboard.

3.4 Storage
Solid State Drives (SSDs) are faster and more reliable than traditional hard drives. Opt for at least a 500GB SSD for your operating system and frequently used programs, and consider a larger HDD for bulk storage.
3.5 Motherboard
The motherboard is the backbone of your PC. Ensure it supports your chosen CPU, RAM, and GPU. Features like Wi-Fi, additional ports, and RGB lighting are optional but can enhance your build.
3.6 Power Supply Unit (PSU)
Choose a reliable PSU with enough wattage to power your components. PC PartPicker’s built-in calculator helps determine the required wattage for your build.
3.7 Case
Your PC case houses all components. Look for a case that fits your build, has good airflow, and matches your aesthetic preferences.
4. Leveraging PC PartPicker’s Compatibility Checker
One of the standout features of PC PartPicker is its compatibility checker. As you add components to your build, the tool flags any potential issues, such as:
- Size constraints between the GPU and the case.
- Insufficient wattage from the PSU.
- Incompatible RAM speeds with the motherboard.
5. Building Your PC Step-by-Step
Once you have all your components, it’s time to assemble your dream PC. Follow these steps:
- Install the CPU and RAM onto the motherboard.
- Secure the motherboard into the case.
- Install the PSU and connect the power cables.
- Mount the GPU and storage drives.
- Connect all components with the appropriate cables.
- Power on the system and check for functionality.
6. Installing the Operating System
After assembling your PC, install an operating system (OS) like Windows 11, Linux, or macOS (for Hackintosh builds). Create a bootable USB drive with the OS installer, plug it into your PC, and follow the setup instructions.
7. Optimizing Your Build
After installation, optimize your PC by:
- Updating drivers and BIOS firmware.
- Installing antivirus software.
- Customizing performance settings for gaming or productivity.
8. Troubleshooting Common Issues
Sometimes, your PC may not boot on the first try. Here are some troubleshooting tips:
- Ensure all cables are securely connected.
- Check for any bent CPU pins.
- Verify that all components are properly seated.
9. Testing Your PC’s Performance
Use tools like Cinebench, 3DMark, or CrystalDiskMark to test your PC’s performance. These benchmarks ensure that your components are performing as expected.
10. Joining the PC Building Community
Becoming part of the PC building community is a great way to share your build, seek advice, and learn new tips. Platforms like Reddit’s r/buildapc and the PC PartPicker forums are excellent places to start.


